Monday, January 28, 2008

Door in the rough...lol...

My way of keeping out the cold


Scrap laminate taped over the outside of the walls sure keeps the 5 degree breeze off of your back ......lol...

Steel under cap (wide veiw)


Later I will layup an inner liner of fiberglass with control panels, switch boards, airconditioning vents. and lighting all bezeled in.

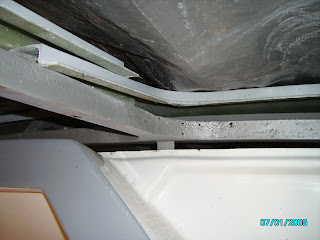
Steel under the new cap


All the steel is in place under the cap now. after I get the bottom of the windsheild frame bowed out like the top I will remove the cap to glass in the changes and seal weld all the seams in the steel. Then I will rustbullet the steel as well as the interior of the cap to seal everthing up tight for moisture control as I build this beast a little piece at a time.

New windsheilds are in the basement now


I got 4 new windsheilds from Eagle in Texas. Two of them are bad as marked. They have oysters along the side and they will only be use for assembly and later discarded after the paint is laid down.

New breast plate


Latter on you will see why I had to cut out the mounting areas for the wiper motors. I really wanted to use them but things did not work out to keep them.

More ceiling length in the coach now?


Sure makes it seem longer inside.

Header above windsheild

Filling in the blank space under the cap.


Now that the top of the windsheild frame is set I can now fill in the area under the top of the cap with its support steel.

Third and fourth cut on the windsheild


I then cut the windsheild header each side of the middle at the end of the flats. about 9 and a half inches if I remember right. Then I bowed each side out and added a peice of square stock in 1 and a half inches longer than the peice I cut out hence making the frame bow out 1 and 3/4 inches from its stock location. This really changes the look of the front of the bus as it is not so flat looking now.

Moving the windsheild frame.


first cut at the two upper rear corners. I did not cut all the way through as I just want the frame to bow out at the middle.

window sill of the new door all ground in and lightly primered


After I get done fitting the cap and when I know I will not have to change the angle of the window for the door. I will remove it and wire brush it for the prep of the rust bullet paint and then skin it with alluminum.

A real good pic of the cap problem

Front cap to new dash


Look a color other than rust or silver. Am I in heaven????

Cap at roof rib.


Fits tight at the roof even with just a gravity fit.

Front cap problem??


This is the bow out in the middle of the cap that I am dealing with.

Front cap needs to fit??


Heres why I decided to build the door. This gap, is about 2 inches and I needed to do something else while I decided how I was going to solve the problem.

Time to make the front cap fit the bus???

Weather stripping flange for door


I welded a 3/4" by 1/8" strip of steel all around the door for closing against the weather stripping. This will also become the lip for clinching the aluminum skin around.