Thursday, April 3, 2014
Drives in miterbox
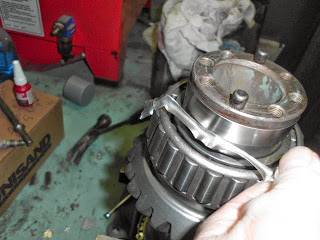
I cant find the pics of the internal drive shafts with the new races and bearings but here are some pics of them installed in the housings. Gear lash was good with the original shims in their original positions. The seal wear sleeves are installed just like the main drive ones shown below.
Miter box bearing race installation
With a little planning this works like a charm. I cleaned the races for the auxiliary drives and stuck them in the freezer. Then after cleaning and bead blasting the housings I put them under scalding hot water. While waiting I run out some bearing grease in a cup. Now two hours after the races went into the freezer I'm ready. I know one side sits flush with housing so that's the one I want to install first then when I flip it, the race wont slide back out. The other side goes further into the housing. I wanted to do them both at the same time to make sure once they come out of the water they didn't have to go back. I had to get the housing out of the water and blow it dry, then put the grease on the race lip and drop the race in. Once the race came out of the freezer I had only seconds before it started to expand. It was pretty cool to see the frost on it disappear as it warmed up and exspanded so tight it would not move. I installed both sides in under a minute without a tool.
Miter box Assembly
You can see I painted the bottom of the housing upside down. I let it dry about a week then righted it and started the assembly. The dern thing weighs so much there was no getting to the bottom afterwards. In these pics you can see the housing after cleaning and bead blasting. Then I have the main drive in and the front and rear bearing housings in place with the new bearings and sleeves on them.
wear sleeve miterbox drive
Wear sleeve miterbox
Subscribe to:
Posts (Atom)