Thursday, January 31, 2013

After cleaning, sandblasting, then three coats of the rustbullet the hardware for the bogie springs are ready to be reinstalled on the frame.
Here is a before and after of the hardware for the trailing arms off the bottom of the bogie springs.
sand blasted just before painting.

Sunday, January 27, 2013

Here shes had her sand bath and is ready for a rustbullet rubdown lol.... Its amazing how much better a part looks without the rust and grease all over it.
In the box and just starting to blast on them. Took a couple days to do both of them and the mounting hardware. Be prepared to paint as soon as you blast. Once you get bare new metal you will want to get some protection on it as it will start to rust almost as soon as you start blasting.
Heres a big boy sand box. I built this sandblasting box outta scrap ply from around the shop. stuck a nozzel and filter in it. I have a smaller version at home but needed something to to large things in. When I need to do the cross members under the engine I will just cut a hole in the end and stuff rags around the hole to hold in the sand while blasting. Good thing about free tools is when you get done with em there is no hard feeling to get over when you chuck em in the dumpster....lol..
Here is one of two of the boggie springs I got from Eric Brown. Good spring just a little ugly though. Its in need of some sand blasting and rust bullet.

Thursday, May 31, 2012

Looking forward inside.
I cut and fit most of the plywood last winter. Screwed on for now and later when I get done inside the walls I will glue and staple it permanently.
Rear wall marine plywood and insulation in. On the radius I used bendable plywood.
Here's a sneak peek inside. I have been busy with the ribbing and spray foaming last winter. I put the pink sheet foam where the windows go so I could remove it later when I cut the window openings out.
Drivers side cut and fit before deburing and rivets....
Curb side.....
Filler up!!!! Deb says its time to hit the road.......
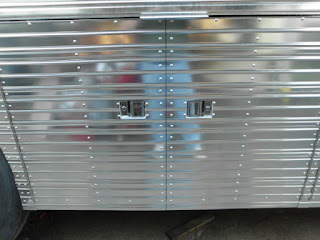
Mirror finish siding.
Rear bay doors and siding pics.
Siding and doors....
Just more siding pics. Area at back of front curb side slide out.
Drip edge dry fit above rear compartment.
24 gauge stainless, I doubled back on it to make it stronger and give it a nice rolled edge. this one is for the top of a set of the bay doors.
Rivet rivet rivet rivet.......sounds like a farm pond around here....lol..... A set of bay doors before I installed the top drip edge.
Jamb side of the front door with the stainless steel flashing and siding installed. Missing are the umbrella caps on the rivets. What is that a plywood floor..... yes most all of the walls and floor are now wood.....more on that soon....
This is a piece of stainless steal that I formed for the jamb. It still has the protective white film on it now. Here its shown drilled, just before I deburred everything.
Front door jamb side right after I drilled all the rivet holes and removed the siding to deburr everything and clean up the fender.
Asphalt side of bays. Just what I wanted to do ..... more rivets.....argggg
I am skinning the bottom of the bays to keep out critters and to keep in the insulation. Below the bays I used .040 thousandths aluminum.
Inside hardware for bay doors. This was sure repetitious installing all the locks since they all had to be custom cut. You guys that have done it know what I mean,,,....
I tapped in a grease fitting for the hinge pins after I got the hinges back from the powder coater. It sure swings freely now lol.....
A close up of the cam locks and inside handle. I have the switch for a key less entry and power lock set.