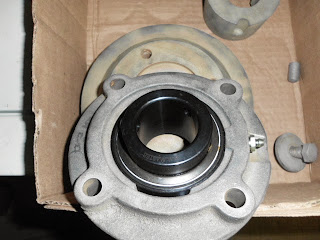
 And here is the tensioner in its proper place on the frame.
Thursday, February 27, 2014
Fan belt pulley
Saturday, February 22, 2014
Bolted the alternator drive back in.
reassembly
Friday, February 21, 2014
Fan drive back on bus
Fan drive complete
vent
fan drive

 Here's the fan drive after I have disassembled, cleaned, bead blasted, and pressed in new bearings. I primered it but will paint it when I get finished handing it. I don't know if it had a dust cover over the exposed end but at any rate here I have coated the bearing end with grease in preparation to pour epoxy in the end to plug it. Its a super thin coat and wont hold in the heat of the bearings.
Monday, February 17, 2014
 I covered the bulkhead above the transmission with 90 thousandths aluminum and cut an access hole for my arms. the conduit was just shoved in there for storage. I have since with a hole saw cut several holes thru for various things like the conduits, power steering, heater lines to the drivers area, and air lines. I sealed each opening for exhaust fumes and water.
Sunday, February 16, 2014
Frame mods
 I modified the frame at the front of the drivers side engine rail for a 740 Allison. I did this off of a tape measure so I wont know till I slide the motor and tranny in for the first time since the frame rebuild. I show I will have 1 inch of clearance but we all know things don't always work out just right but well see in the end.
alternater drive mount
Saturday, February 15, 2014
New tail light fixtures
No latch

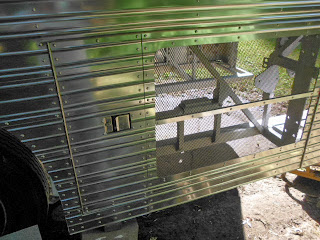
 I didn't see the need for opening the door for the radiator all the time so I just made a couple brackets and welded on a nut. I just have to remove two bolts and I can swing out the door. I needed the stainless steel hinge to be there to keep the outside looking the same. Besides, that door isn't light so an access panel was out of the question. I like the way it turned out anyways.
Last two exterior doors
Radiator line up
Welding in the mounts for the radiator


 Now with the shroud in place I floated this incredibly heavy setup of copper and steel to line up the opening in the shroud up down in out. Then I tacked welded the rear plate in place and checked all the measurements again. When I were sure it was where I wanted it I welded both plates in. I cant tell you how big of a job this was for one man.
Temporary mounting the fan
Subscribe to:
Posts (Atom)


